Use the Web UI
Labtasker WebUI connects to an existing Labtasker v2 Server or local project. Use it to inspect Queue progress, Task details, errors, and structured results in a browser.
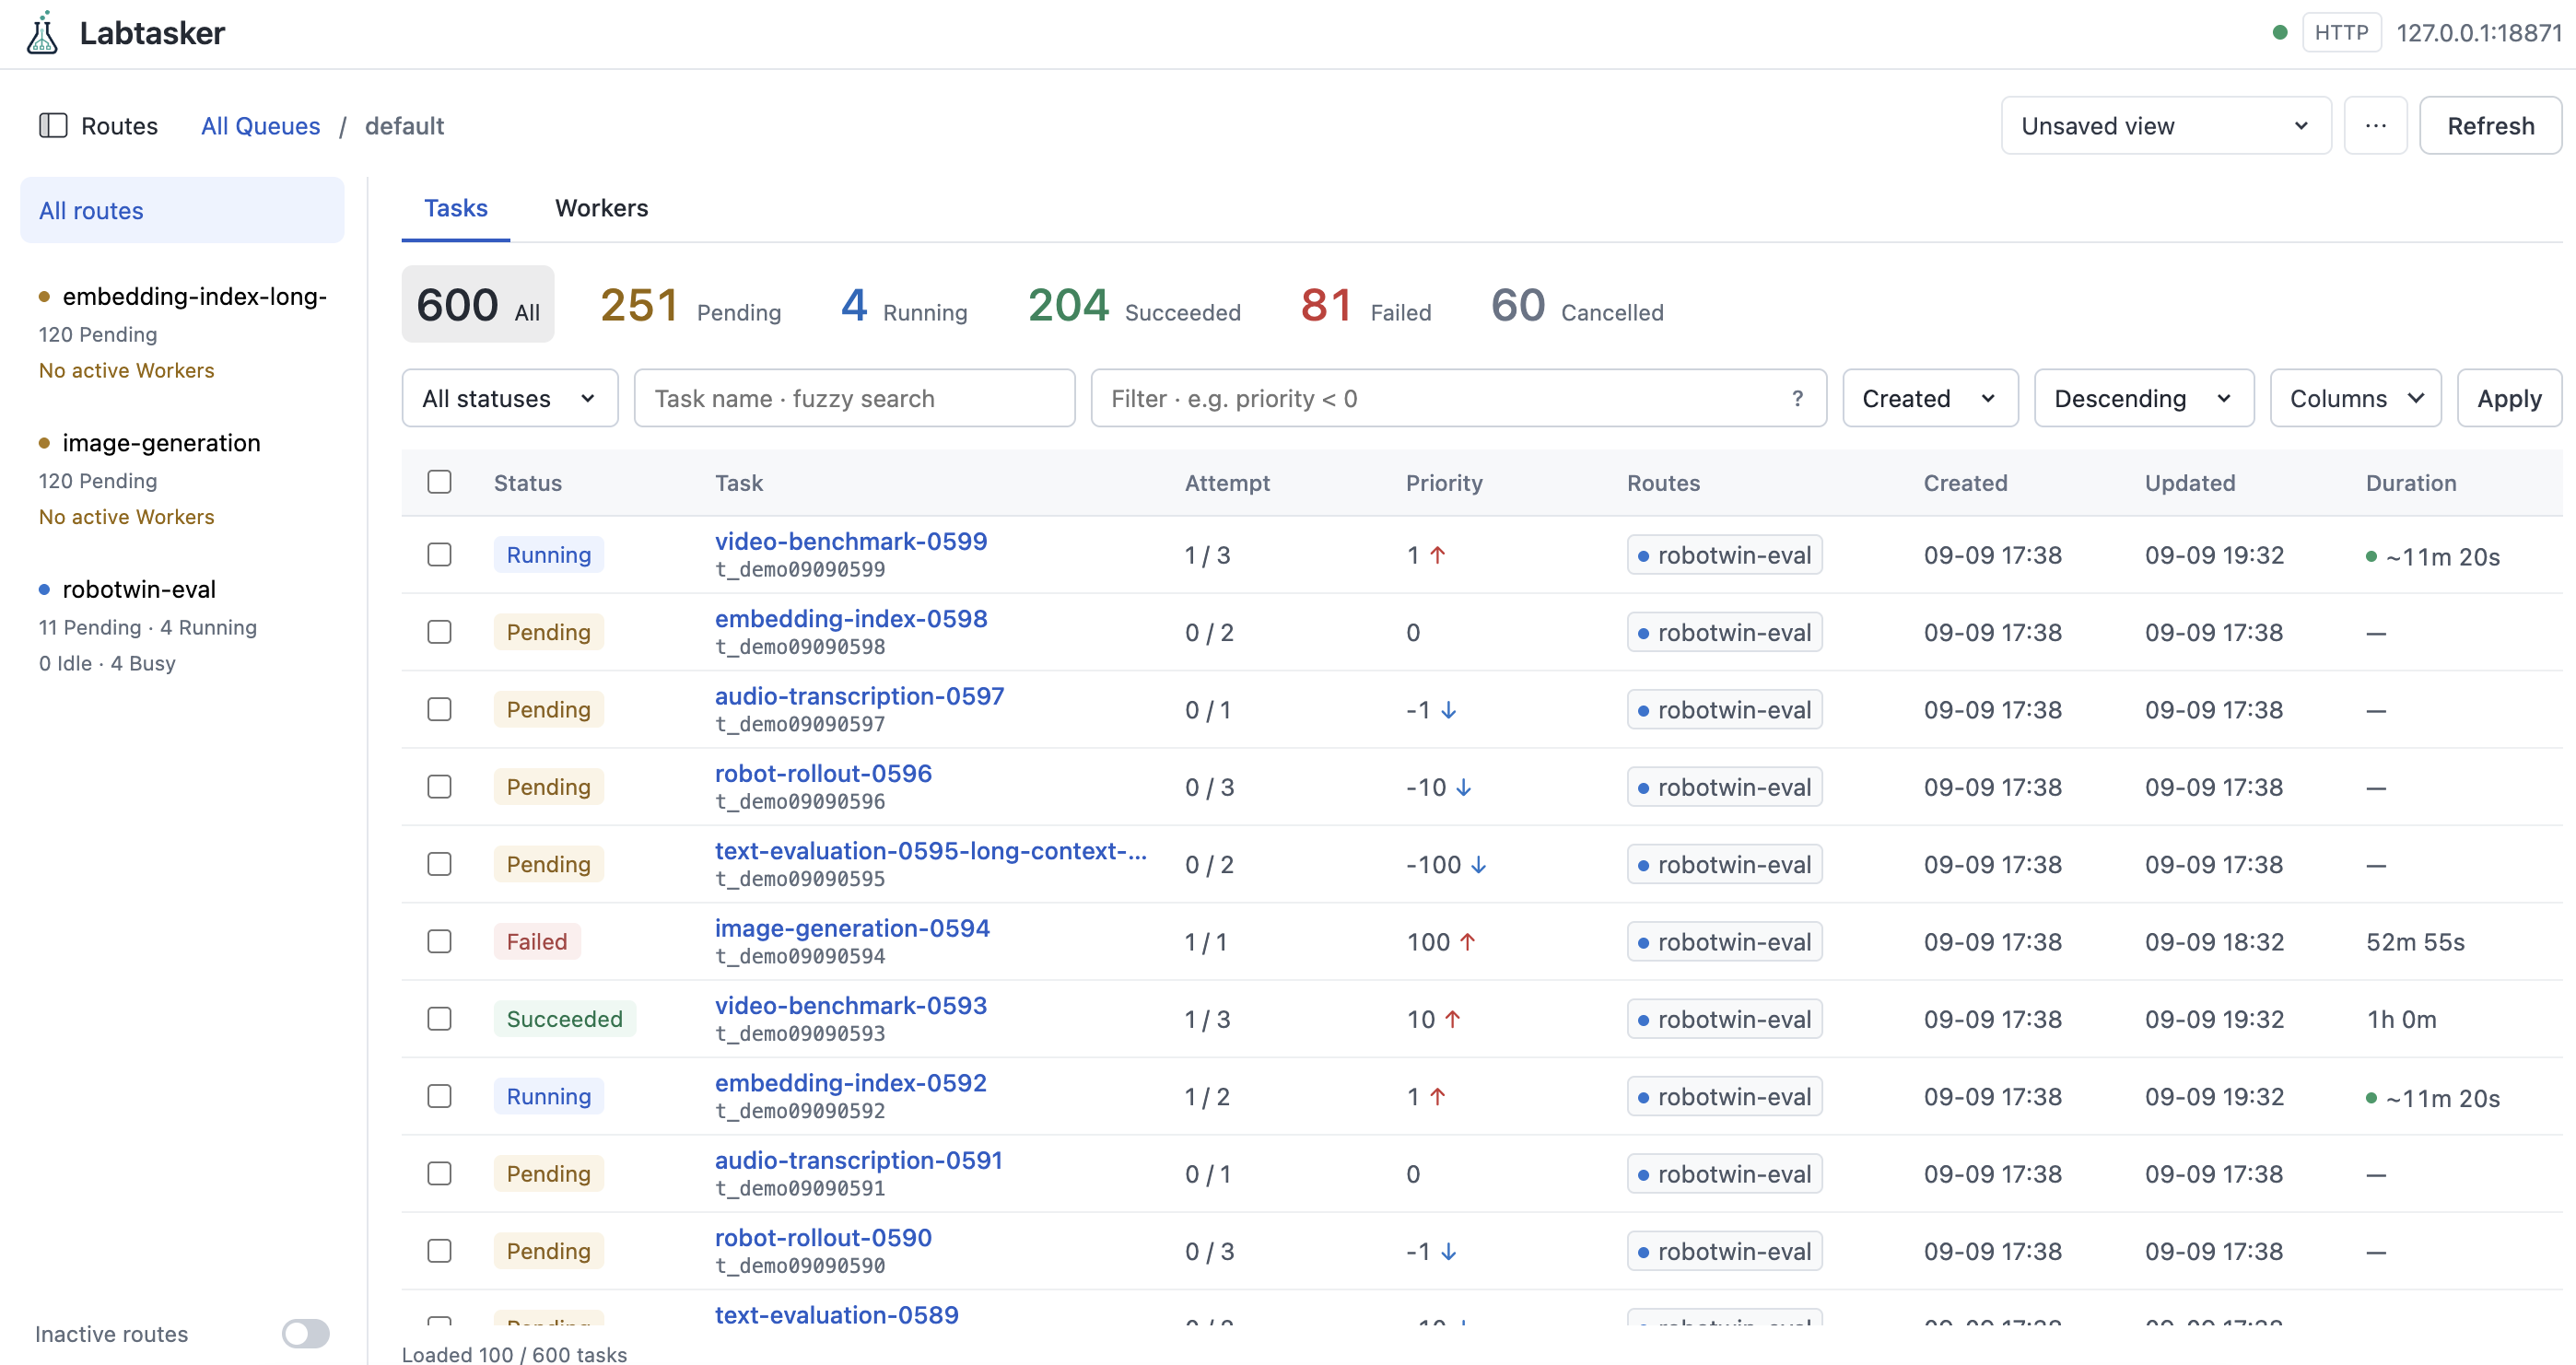
Launch and connect
The WebUI is installed separately from Labtasker. It requires Python 3.11 or newer; the package includes the frontend, so Node.js is not needed.
uvx labtasker-webui
Open http://127.0.0.1:8080 and choose a connection:
- HTTP Server: Enter your Labtasker Server URL and its Bearer token if authentication is enabled.
- Local project: Enter the project directory of an already-running local
Server.
.means the directory where you launched the WebUI. This connection requires POSIX and the WebUI's default loopback bind.
For local use, run labtasker-server start in your experiment directory first
if its Server is not already running. The WebUI attaches to the existing
instance; it does not start the Server. See Configuration
for Labtasker Server setup.
Explore an experiment
Open a Queue to see its Task list and status counts. The Task name input uses case-insensitive fuzzy
subsequence search: tr ev and ev tr both find train_model_eval. Every
whitespace-separated word must match. Press Enter or leave the input to apply;
clearing it removes the name restriction. List and count matching runs on the
Server across the Queue, with the existing sorting preserved. For strict equality,
use name == "train_model_eval" in Advanced filter.
Filter by status or use a Task query, for example:
status in ["pending", "running"]
Use Columns to add nested fields such as args.seed or result.score.
After the first experiment tutorial, add
result.score to compare its three recorded scores. Click a Task to inspect
its arguments, metadata, execution timeline, errors, and results.
Save filters, sorting, and column layouts as a view to reuse for that connection and Queue.
Manage selected Tasks
The WebUI supports cancellation, requeue, and permanent deletion of selected Tasks, subject to the same lifecycle rules as the Client and CLI. Continue using the Client or CLI to submit Tasks and change their fields, and Workers to execute them.
See the WebUI README for installation alternatives, saved connection settings, and deployment options.